This page in brief
For years I had a self-coded HTML website with a blog attached. Late last year I made the decision to make it entirely built on WordPress, which necessitated converting about a hundred HTML pages to WordPress pages, and solving quite a few problems along the way.
I am not a professional coder. I am moderately proficient in HTML and CSS, and have a rudimentary understanding of PHP (the language WordPress is written in) and WordPress. If you are setting up a WordPress site, or converting to a WordPress site, and have similar skills (or lack of them), these notes may help you.
But readers who aren’t interested in the mechanics of WordPress may gracefully bow out now!
Contents
- Why change?
- Decide on your aims
- Choosing a theme
- Image sizes
- Adding widget areas
- Context sensitive sidebars
- Home page layout
- Changing from HTML to WordPress
- Plugins
- Menus and menu descriptions
- Custom fields
- Links to related pages and posts
- Subscribe to blog and to comments
- Footer text
- Customise post info
- Previous and next post links
- Site lighthouse icon
Some words of warning
In many cases, the things I outline here can be achieved by adding a plugin. I chose to code instead, to reduce the number of plugins, which generally have more features and longer code than I needed.
It is important not to change the core WordPress files and your theme files unless you really know what you are doing – and you probably wouldn’t be reading this if you were an expert! The changes I suggest here are all made in the functions.php or style.css files, which it is OK to modify.
If you are using this page to assist you in your own set-up, I suggest you check out the relevant references to get more information than I give here. I also set up a “trial” site on some free webspace I had, and tried everything out there before attempting it on my real site. I strongly recommend this.
And don’t forget to back up your files and database first.
1. Why change?
I had several reasons to change to a WP site:
- My previous site was mainly self-coded HTML pages with a blog attached. I copied the design of the blog for the design of the HTML pages, which was a difficult process. When I wanted to update the design, I thought it was too much trouble to try to copy a blog design again.
- WordPress, and the theme I used, had a number of features that make things easier – better responsive design for mobile phones, having featured images that allowed thumbnails to appear when linking to any page, especially showing “related post or pages” at the bottom of each page, automatic menus, etc.
In all the below, I am assuming we are talking about a self-hosted site, where we have the freedom to do what we choose. This isn’t the case with a site freely hosted at WordPress.com.
2. Decide on your aims
This is one of the most important things, for it influences most other decisions. You’ll probably know what you are going to blog about and what you’ll include (will it be text, photos, advertising, music, family or holiday updates, etc?), but you’ll also need to consider questions like:
- Is it private to your family and friends or do you want to attract new readers?
- How will new readers find your site? (Google? Links from other sites?)
- Are you wanting to encourage comments and participation?
- Are you wanting to build a community of followers?
- Is the accent on beauty (photos, design) or is it on text (so large graphics may slow things down and get in the way)?
3. Choosing a theme
There are several questions to answer here.
Free or Premium?
Many good themes are available for free, and it is probably best to start with one of them, until and unless you find they are inadequate for your needs. If you choose Premium, then you also have to choose a theme provider.
I chose the Genesis Framework by Studio Press for this update, even though it was a little more expensive, because I thought it has a better structure than most themes. WordPress freely provides the basic software for the blog, and most themes then provide files to define the specific features, structure, layout and design of the blog. But Studio Press puts a lot of that into the Genesis Framework, which is the same for every theme, can easily be updated, and doesn’t have to be altered by the user, with each theme containing only the design features. This makes upgrading much easier.
But other theme providers are also good. Previously I used Themify and found their product and support to be very good.
Choose by design?
Many themes are designed for a particular purpose – photo gallery, ecommerce, family diary, news or magazine, etc – and obviously we have to choose a theme that fits our purpose. Having settled that, the most obvious course would seem to be to look through themes and find one that is pleasing to the eye (based on colours, fonts, layout, graphics, etc) and go with it. But this leaves unaddressed several other important questions ….
Choose by features
Themes don’t only offer a visual design; each theme also has a set of features that may or may not be important to you. For example:
- location of widget areas, and the ability to put widgets where you want them;
- location of menus, and whether you can have drop-down menus;
- number and location of sidebars;
- size of featured images;
- can the header include a site logo?
- different page templates.
It is more important to have the features you need, for it is much easier to tweak the visual design by changing fonts or colours. If you are confident to make changes (which is what the rest of this blog post is mainly about), then this won’t matter so much, but I feel features should be chosen before visual design.
I chose the Minimum Pro theme because it had a minimal design (almost like a blank canvas) which allowed me a lot of flexibility.
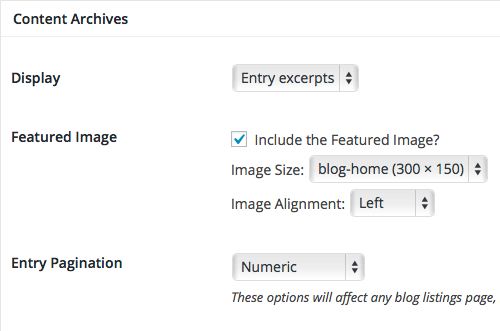
4. Image sizes
I recommend deciding this early on, because whenever an image is loaded into the media library, WordPress makes several copies of different sizes, for different uses on the site. For example, the featured image at the top of a blog post will generally be quite large (say about 700px x 400px), but when used on the blog home page or archive, or in the Genesis – Featured Posts widget, it will be much smaller. These sizes are set in the functions.php file in the theme folder.
You can remove the code for any image size that you don’t want, and then set the sizes you do want with this simple command:
add_image_size( 'portfolio', 540, 270, TRUE );
The width and height are specified, ‘portfolio’ is the name you give that image size, and the ‘TRUE’ crops the image to that exact size, whereas ‘FALSE’ (or the default if blank) fits the image into the size specified, even if one dimension is under the specified size. For this reason, I suggest making all images the same proportion if you can. I chose a proportion of width = 2 x height to make things very easy.
The following code is also necessary, so the names and image sizes can appear in a drop-down box when you load an image into a page:
add_filter( 'image_size_names_choose', 'my_custom_sizes' );
 function my_custom_sizes( $sizes ) {
 return array_merge( $sizes, array(
 'link' => __( 'Link' ),
 'home' => __( 'Home' ),
 'blog-home' => __( 'Blog home' ),
 ) );
 }
When this is done, when setting image sizes for archival pages or Featured Posts widgets, the nominated and named sizes will appear in the selection box.
You can see now why I suggest choosing image sizes early on – if you change sizes, any images you have uploaded will now be the “wrong” shape, and you may have to re-load them. Changing sizes can be facilitated using the Regenerate Thumbnails plugin, although I haven’t used this so far.
Featured images
To allow featured images on both posts and pages, I had to add this code to the functions.php file:
function featured_post_image() {
 if ( !is_singular( array( 'post', 'page' ) ))  return;
 the_post_thumbnail('post-image');
 }
 add_action( 'genesis_before_entry', 'featured_post_image', 1 );
5. Adding widget areas
Widget areas are necessary if you want to use widgets – I like stating the obvious sometimes! And the theme you choose may not have them where you want them. Fortunately it is easy to arrange this – generally.
I wanted to use a number of widgets, and I wanted them in specific locations, such as on the Home Page (Featured Page, Featured Posts), on the blog home page (Recent Comments, Tag Cloud), on all sidebars (Facebook Like Box, Welcome text), or just on selected sidebars (Subpages). Some of these widget areas were already available, but a few were not.
Hooks
Widget areas are set-up in the functions.php file, and must be placed on the page using a hook. A hook is a location within WordPress that is given a specific name so that widget areas or other features can be placed there. I have found hooks, which are well supported in the Genesis Framework, to be one of the most useful WordPress features.
The code for new widget areas looks like this (the example is from my Sitemap page):
//* Add widget area to make sitemap page
 genesis_register_sidebar( array(
 'id'            => 'sidebar-after-content',
 'name'          => __( 'After Content for sitemap' ),
 'description'   => __( 'This is a widget area that can be placed after page content to make the sitemap' ),
 ) );
add_action( 'genesis_entry_footer', 'nabm_add_page_content' );
 function nabm_add_page_content() {
 if ( is_page('1234') )
 genesis_widget_area ('sidebar-after-content',array(
 'before' => '<div class="sitemap"> <div class="wrap">',
 'after' => '</div> </div>',
 ) );
 }
The first section of code simply names the new widget area, in this case allowing me to use the Subpages widget for my sitemap page. The genesis_entry_footer is the name of the hook used to place the widget area after the content of the page (in the case of the sitemap, the content is blank). The ‘before’ and ‘after’ place the widget in a couple of divisions so I can style it. The page number allows this widget area to only be placed on the numbered page.
Reference: WordPress hooks by Treehouse and wpmudev.
6. Content aware sidebars
I wanted to show all the pages in each section of the website using the Subpages widget. For this I used the Content Aware Sidebars plugin. This allows a different sidebar widget area to be added to nominated pages, in addition to the Primary sidebar widget area that is the same in each section. I have 12 additional sidebars using this plugin.
7. Home page layout
I wanted the home page layout to have lots of links to important pages, with thumbnails of each page’s featured image. This required me to set up a number of additional widget areas (as in #5). Most of what you see on the home page is in Text or Featured Page widgets in a dozen widget areas.
8. Changing from HTML to WordPress
This was the step I was most worried about, for it had the potential to crash my site. In the end everything went fine.
There were a few issue to resolve first.
- I needed to decide the structure of the site. The old site had folders for every section of the site, including the blog. So the blog was in a /blog folder and I wanted it to stay that way, so the blog URLs didn’t change.
- I would have preferred the webpages to also remain the same – same names, same folders = same URLs (e.g. sitename/clues/pagename/), but WordPress pages don’t have folders. So I had to create pages for each section, and then make all the other pages in that section “child pages” of that “parent page”.
- At first, I wanted to retain the / file extension, to keep the URLs the same, but the code to make this happen was extremely fussy, and I never got it to work satisfactorily. In the end I decided it may be better to stick with standard WordPress URLs without any file extension.
- But this meant I had to add about a hundred ‘301 redirects’ to my site’s
.htaccessfile. This was tedious, but worked fine.
The procedure was as follows (taken from the WordPress Codex):
- In the General panel (under Settings), make the site address the root directory (i.e. sitename/). (The WordPress address remained sitename/blog.) Save changes.
- Copy (not move) the WordPress
index.phpand.htaccessfiles from the /blog directory to the root. - Edit this
index.phpfile (one of the few times when it’s OK to edit a WordPress file), changingrequire( dirname( __FILE__ ) . '/wp-blog-header.php' );torequire( dirname( __FILE__ ) . '/blog/wp-blog-header.php' );, and save. - Add to the
.htaccessfile any commands you had before and still want. - Login to the site under the old address and reset permalinks by adding /blog.
- I had to change change some menu items manually, but that was all.
The hard, slow task of transferring the pages
Then of course I had to convert all the existing HTML pages to WordPress pages. This was by far the longest part of the process, because there were over a hundred pages and each one had to be done individually, while the existing HTML site had to be kept in place.
Making it more difficult was the directory structure. The whole site is in sections, which formerly had the structure: sitename/section/pagename/, where section was just a folder in the root directory. But now section was an actual page, and when I tried to set up that page, the server system wouldn’t allow a page and a folder of the same name.
I tried transferring the pages in sections, setting each section up initially with a dummy name, and then changing the name when the section was complete and I could scrap the old HTML pages in that section, which worked (WordPress is good like that – you can change names of parent pages and it automatically changes the links), but later Google had problems coping with the changed names, and I am still getting page “Not found” errors from Google Analytics.
So I decided the best way was to set up all the pages in a section as “draft” only, and this satisfied both the server and Google.
Transferring each section required the following steps:
- Work out page orders in advance.
- Set up the section page and any subsection pages first.
- For each page, copy across the text, meta, references, etc, from the original HTML.
- Select parent page and order.
- Modify the URL given by WordPress to make the page name the same as before (except without the
/extension). - Add featured image and any other features (e.g. quotation in the footer).
- Check all links. This is the easiest step to get wrong, so I just had to keep checking – and I still am!
- Save all pages in draft only.
- When all is done, prepare and upload the new
.htaccessfile with the required 301 redirects. - Remove the old HTML pages.
- Publish each page, where possible, adding Related pages (see #12 below) – not possible at first because the pages can only appear in the Related Page list once they’re published, so I had to go back and do some later.
- Check if main menu links need changing.
- Check everything – pages, links – appears as it should.
9. Plugins
I have tried to install as few plugins as possible, to avoid possible conflicts between plugins and to keep the site as lean as possible. For the record, I use these:
- Backup WordPress – backs up my database every week.
- BAW Manual Related Posts – puts thumbnails and links to related posts below pages and posts – see #12 below.
- BE Subpages Widget – automatically generates a list of links for all subpages of a parent page – used in every page sidebar, and on the Sitemap page.
- Content Aware Sidebars – allows different sidebars for different sections.
- Enhanced Media Library – using featured images on each post and page means I have hundreds of images; this allows me to tag and find images easily.
- Facebook Likes You! – simple Facebook Like button or box wherever I want it.
- Google XML Sitemaps – helps Google index my site.
- Simple Comment Editing – provides the ability for commenters to modify their comment after they have posted it.
- Subscribe to Comments – allows readers to be notified of subsequent comments – see #13 below.
- Subscribe2 – allows readers to subscribe to the blog and be notified of new posts.
- Tako Movable Comments – allows me to move comments to a more appropriate place, if necessary. (Probably the least important plugin I use.)
- WP Captcha Free – a spam filter that doesn’t require a Captcha.
10. Menus and menu descriptions
Menus are generally located in the obvious places (generally header and footer) and there isn’t much you need to do apart from enter the items you want. But I wanted to have short descriptions below the items in my main menu – I had this in my previous theme and I thought it was helpful.
Doing this required two things. First, I needed to add the text I wanted to each menu item Description. (Menu items in WordPress have a URL and Navigation label, but can also have a Title attribute, which appears in a little box if you hover over the menu item, and a Description)
Then I had to make the Description appear below the Navigation label in the menu itself. This required use of the WordPress ‘Walker Class‘, which is designed for use with hierarchical structures – if that sounds vague, it is because I still don’t really understand it. But this is the code in the functions.php file, which modifies the text in the menu:
function be_header_menu_desc( $item_output, $item , $depth, $args) {
 $item_output = str_replace( '</a>', '<br /><span class="description">' . $item->description . '</span></a>', $item_output );
 return $item_output;
 }
 add_filter( 'walker_nav_menu_start_el', 'be_header_menu_desc', 10, 4 );
11. Custom fields
My old site had a relevant quotation in the footer of most pages, and I wanted to continue with this. There are plugins that allow this, but I ended up inserting code myself, with the help of Victor Font at the StudioPress forum. The solution uses custom fields, as follows:
- I created a new custom field named “quote”. Simply edit any page and ensure that ‘Custom fields’ is selected in the Screen Options. Then go down near the bottom of the page to the Custom Fields section and enter a new field named quote.
- I created a new file named
quote.phpand put it in my theme folder. It had the following code: - I inserted the following code in the
functions.phpfile: - This was a bit tricky. I couldn’t get the custom field to appear at the beginning of the footer as I wanted, so I chose to put it before the footer (using the
genesis_before_footerhook) and then style it so it was identical to the footer. To get it to look right in Minimum Pro, I needed it inside a “quote” div and a “wrap” div, and using an echo before and after thequote.phpfile was called was the way I made that happen. - I then styled the
div.quoteto have the same background as the footer and to have the size text I wanted.
<?php
 global $post;
 echo get_post_meta($post->ID, 'quote', true);
 ?>
add_action( 'genesis_before_footer', 'quote_field' );
 function quote_field() {
 echo"<div class=\"quote\"> <div class=\"wrap\">";
 require(CHILD_DIR.'/quote.php');
 echo"</div></div>";
 }
Then on any page, while editing, I simply select the quote field and enter the text I want.
Bylines
I later found another use for custom fields. I wanted to be able to add a byline for some posts, to go below the post title but above the featured image. I did this the same way, creating a byline custom field, then a byline.php file with the following code:
<?php
 global $post;
 echo get_post_meta($post->ID, 'byline', true);
 ?>
Then finally I added the following code to modify the post information (see also #16 below), using the hook genesis_post_info:
add_filter( 'genesis_post_info', 'byline_field' );
 function byline_field() {
 echo"<div class=\"byline\"> <div class=\"wrap\">";
 require(CHILD_DIR.'/byline.php');
 echo"</div></div>";
 }
12. Related posts (and pages)
I think it is helpful to offer readers links to similar posts or pages at the end of the text. My plan was to do this automatically, but further reading suggested that this was likely to require significant extra calls to the database as the plugin searched for posts with similar tags or the same category, which might slow the website. I didn’t want to risk this, so I decided to select the posts manually.
So I use the BAW Manual Related Posts plugin, which requires me to manually select posts or pages from a drop-down list while editing. It works fine, except (1) the search function (to find a relevant post) doesn’t work for me, so selecting is a little more tedious, and (2) the posts don’t appear in the order I select them, but in an order the plugin determines. But these are small issues.
13. Subscribe to blog and comments
I wanted to offer two different forms of subscriptions – to be notified of all new posts, and to be notified of new comments on a particular post. The Subscribe2 plugin has worked well for blog subscriptions, but the Subscribe to Comments, which had worked well previously, stopped working properly when I upgraded. I wasn’t happy with any of the alternatives, so I persevered and found help on the StudioPress forum which finally resolved the issues. I needed to make two changes:
I added this code to the functions.php file:
/*** Show Manual Subscription Form
 * https://codex.wordpress.org/Function_Reference/comment_form
 */
 function itag_show_manual_sub_form() {
 if( function_exists('show_manual_subscription_form') )
 show_manual_subscription_form();
 }
 add_action( 'comment_form_after', 'itag_show_manual_sub_form' );
 add_filter( 'comment_form_defaults', 'cd_pre_comment_text' );
Then in the plugin file (subscribe-to-comments.php) line 168 (which was add_filter( 'comment_form_defaults', array( $this, 'add_checkbox_to_default' ));) had to be commented out, and then it worked fine.
Change the comment message
I also wanted to change the message before the comment box. This required the following code in the functions.php file:
/**
 * Change the text output that appears before the comment form
 * Note: Logged in user will not see this text.
 */
 function cd_pre_comment_text( $arg ) {
 $arg['comment_notes_before'] = "Text goes here";
 return $arg;
 }
14. Footer text
The standard footer in my theme included a copyright notice, a mention of the theme name, and a Log in/out link. I wanted to change the wording of this slightly, and also add an automatic “Date last updated”.
This required another section of code in the functions.php file, modifying the standard Genesis code, and using the WordPress the_modified_date function.
function wpb_footer_copyright_text () {
 echo '<div class="creds"><p>Copyright ©' . date('Y') . ', unkleE, based on Minimum Pro theme & Genesis Framework · Page last updated: ';
 echo the_modified_date('j F Y') . ' · ';
 echo do_shortcode('[footer_loginout]');
 echo ' </p></div>';
 }
 add_filter( 'genesis_footer_creds_text', 'wpb_footer_copyright_text' );
Reference: Change the Genesis Theme Copyright Line in Footer for WordPress by WP beaches.
15. Customise post information
I wanted to amend the standard post information that appears just under the title, to omit the blog author (since there is only me). I found this code which uses the genesis_post_info hook:
add_filter( 'genesis_post_info', 'sp_post_info_filter' );
 function sp_post_info_filter($post_info) {
 if ( !is_page() ) {
 $post_info = '[post_date] [post_comments] [post_edit]';
 return $post_info;
 }}
16. Previous and next post links
I think it is handy to have links to next and previous post at the bottom of each post. Brian Gardner provided this code:
add_action( 'genesis_entry_footer', 'genesis_prev_next_post_nav' );
17. Site lighthouse icon
Choosing Header Image replaces the site title with a graphic, but I just wanted to have a small graphic alongside the site title.
Victor Font at the StudioPress forum solved this (and several other ) problems for me, with this code, which uses the nifty “before” pseudo element:
.site-title a::before {
 content: url('graphic.png');
 margin-right: 12px;
 }
I am still unable to place it in the exact position I want – evenly spaced above and below the text – but at least it is there.
Where to get help
I could never have done this myself. I posted many times on the WordPress forum and StudioPress forum, and generally found helpful responses. Searching on Google also gave many answers.